Do you have a Creality Ender 3 or ender 3 pro 3D printer and want to get better prints? Then you should have the most uniform Ender 3 Cura settings. Follow our article for some tips from our expert about dialing in your ender 3’s Cura profile settings and machine settings. First, we must understand what cura does for our 3D printer.
Cura is a great free resource for slicing your prints, which is an essential process to 3d printing. Cura takes your file that you want to print and turns it into g code, which is code that the ender 3 3d printer reads and tells the printer what to do.
Now that you have a basic understanding of how your 3D printer and slicing software works we can move on to dialing in your print settings on your ender 3. Some of the topics we will go over are printing speed, printing temperature, layer height, retraction, fan speed and how to change them on your cura profile.
For starting out with your ender 3 3D printer we recommend using the default profiles as a base line. Once you feel confident in making changes then do so and try one or two modifications at a time and see if you see any improvements on your prints.
We recommend dialing in your ender 3 this way because starting with a base line is a great way to start, and adjusting one or two cura settings at a time is a great way to make changes and physically see if those changes made a difference in your ender 3's print quality. We recommend ender 3's as a great beginner printer for all these reasons.
Contents
Why choose an Ender 3?
Ender 3’s make great starter 3d printers, because of the low price point and relatively ease of use. For around $200 these make a great starter printer or even a great companion to have along side your fleet of printers. The build volume is unmatched for the price point the ender 3 is at, printing a volume of 235 mm x 235 mm. Quality is on point with machines that might cost at least double the price of other printers.
Our Recommended Ender 3 Cura settings
Print speed – 50mm/s
First Layer speed– 20 to 25 mm/s
Temperature – depends on material: PLA: 200 C
Bed Temperature – PLA: 50 to 55 C
Layer Height – 0.12mm to 0.2mm
Infill – 10 to 20 %
Retraction– 5mm at 45mm/s
Print Speed and Temperature
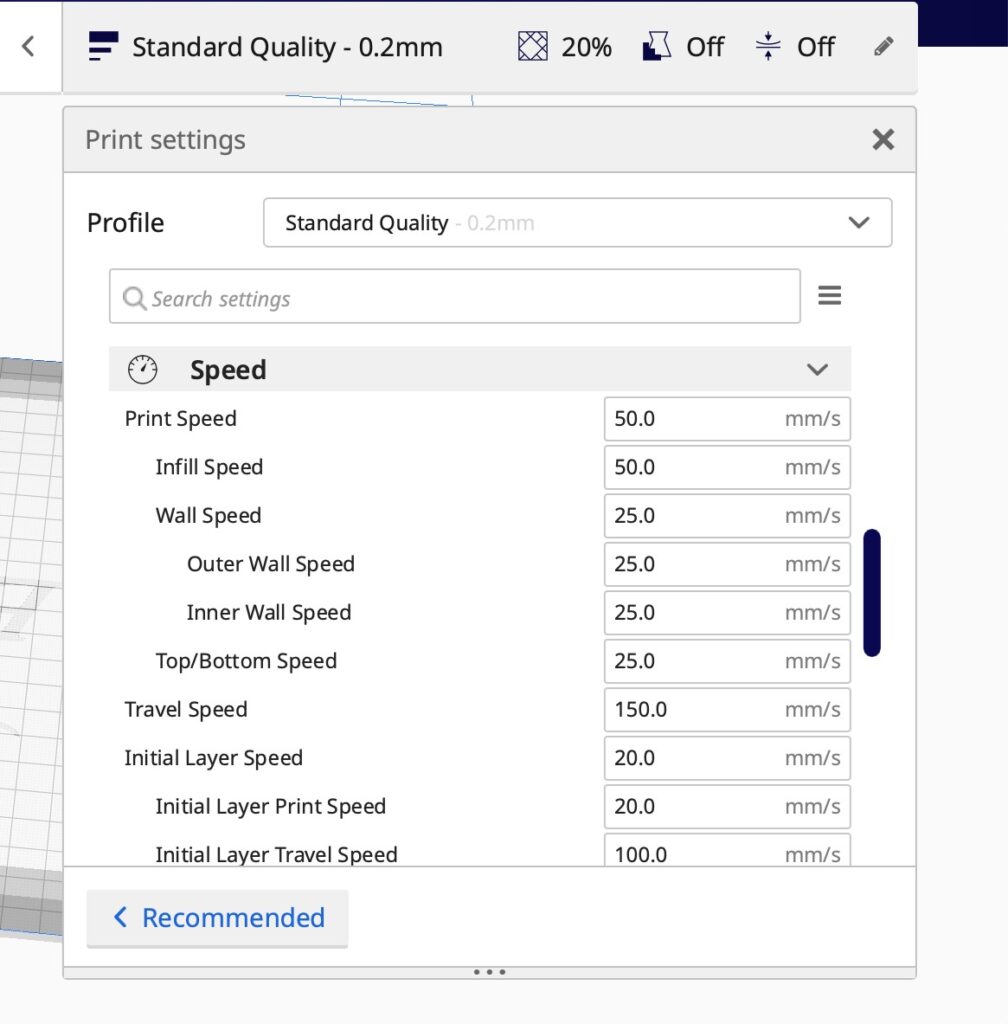
Print speed and temperature are arguably one of the most important slicer settings. These can have direct impacts on quality and print adhesion. Our first tip on improving your print settings is to lower your print speed for the first layer.
This will ensure a better adhesion to the bed. Next goes hand in hand with bed adhesion, is your printing temperature. Printing temperature should be changed on basis of your material selection. For example PLA usually prints within a certain range of temperature like 190 C to 220 C for the extruder, and ABS typically prints with a much higher temperature range of 240 C to 270 C.
We recommend using recommended temperatures from the filament manufacturer. For Print speed, we are going to adjust our initial layers print speed to 20 mm/s and you can change this to a lower speed if you are having poor bed adhesion. Next is the print speed normally, we will set that at 60mm/s again this can be changed if you would like to print faster. Take a look at our Cura settings above.
Printing speed should be changed on what material you have selected to use. PETG should have a reduced printing speed from what your PLA settings are, this will reduce the stress on the material and allow for better prints. For PETG we recommend slowing it down by 10 to 20 mm/s.
ABS can be printed at around the same speeds as PLA because it is a similar material. If in doubt start out by using a slower print speed at first and when you get more and more comfortable with the material and your ender 3 you can always experiment with faster and faster speeds.
An Ender 3 is capable of over 100mm/s with the right settings although details wont always be as complete. As with any printing speed related defects, the higher the speed is set at the less detail the printer is capable of.
Material Selection
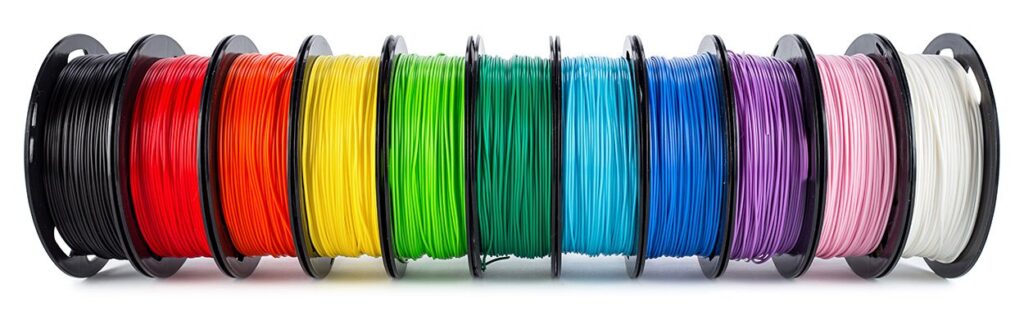
Choosing the correct filaments for your 3d printer can be a great way to diversify your material choice. With your Ender 3 3D printer you are able to print a wide variety of different filaments. Some of the most popular filaments to try are PLA, ABS, and PETG.
One thing to notice is that you will have to change your printers cura settings for each filament you are using, you have to do this because each filament has a different temperature and set of cura settings that it works best with. In this article we will be using PLA as a baseline for setting up your ender 3 3d printer and creating your cura profile.
PLA
PLA typically is the easiest filament to print with, it is a very forgiving material and is safe to work and print with. Some things to know about PLA is that it can easily warp and degrade if exposed to the elements and summer or hot environments.
PETG
PETG is a great material for something that needs to be durable. PETG is a food safe plastic but we don’t recommend using it for food safe applications as the layer lines can promote harmful bacterial growth. PETG can be a stringy material when printed, with enough dialing of your machine it should be possible to reduce the amount of stringing when playing with retraction speeds and fan cooling.
ABS
ABS is usually harder to print with your 3d printer. It requires more patience when working with. The material itself is quite heat resistant and makes for strong parts. One thing to keep in mind when printing with ABS is that it can generate toxic fumes when its being printed, we recommend only printing ABS in a well ventilated area. ABS also likes when your printer is encased, which allows the plastic to cool evenly, without letting the ABS cool all the way can cause warping in your print.
TPU
TPU also known as thermoplastic polyurethane, is another common 3d printer filament. What makes this material different from the others listed above in the article is that TPU is a flexible material, which can be used to make flexible parts. It is a popular choice in the 3D printing community for applications that need flex and resistance.
Although, it can be a more challenging material to work with because of its flexible nature. Some upgrades might have to be performed for it to work right, for example a direct drive extruder, because with the boden tube extruder the material can cause blocks or stretch easily.
Bed Temperature
For your ender 3’s bed temperature it depends on your material choice. A filament such as PLA a bed temperature of 50C to 60C works best in our experience. This is another print setting that can have direct effect on your model sticking to the bed.
If your filaments are not sticking to the bed try upping the bed temperature a little bit. This setting can also help prevent your first layer of your prints from warping. By slowing testing different temperatures you can find the best temperature for your Ender 3. For PLA we currently have our ender 3’s bed set at 55C.
Layer Height
Layer height is directly dependent on what resolution you would like your Ender 3 to print. For most models we recommend a 0.12 mm to 0.2 mm layer height. A lower layer height leads to a faster print time, but can lack some of the details on the model.
For a higher resolution on your 3d printers quality the 0.12 mm layer height is recommended. For lesser quality and faster print times 0.2mm can be used. These layer heights are easily changed on a model per model basis on Cura.
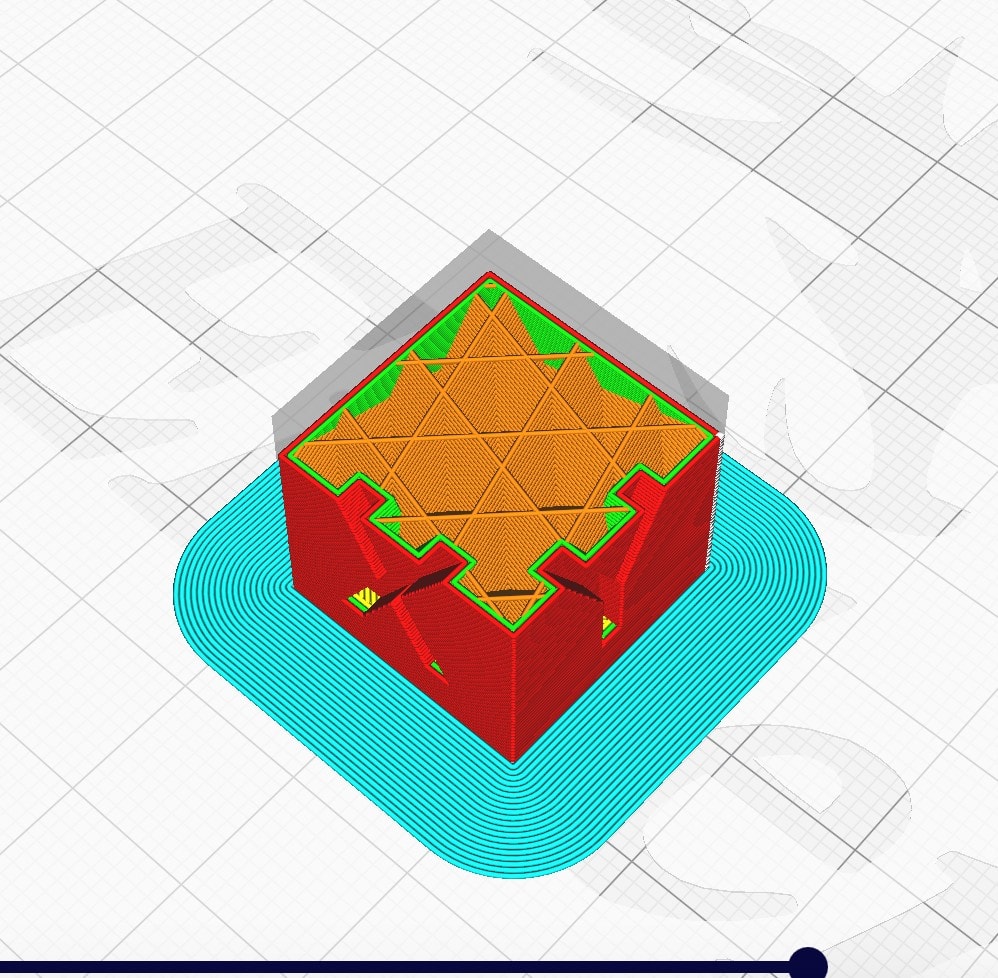
Infill
Another Cura setting to take a look at is your infill percentages. These settings can range from 10% to 100% infill, this setting dictates how solid your model is printed. A higher infill percentage means the stronger the part will be. Depending on your models end use infill should be looked at with fine detail, because this cura setting can have effect on how strong your print is. A lower infill setting will equal a faster print time. If your 3d printing project does not require high strength a lower infill would be a great idea so your model prints out faster.
Build Plate Adhesion
If you are having problems getting your printers models to stick to your build plate, and have already played around with the temperature and bed temperature cura settings, this may be a way to fix any bed adhesion problems your 3D printer may be encountering.
If you are having problems with your prints or models sticking to the bed of your printer a raft may be used. This will ensure your model sticks to your 3d printers bed and reduce the risk of your model warping. A raft is about a 3mm platform of plastic that your model will stick to.
Another way to get your print to stick to your glass bed is to turn the brim setting on in the build plate adhesion. This will put about 6 mm radius of a first layer around your print. Using a brim will help stick your model to the bed and greatly increase the sticking force of your models corners.
Having a brim is beneficial because it uses a far less amount of material as a raft and has the same characteristics as a raft, making for non-warped prints and great layer adhesion.
Retraction
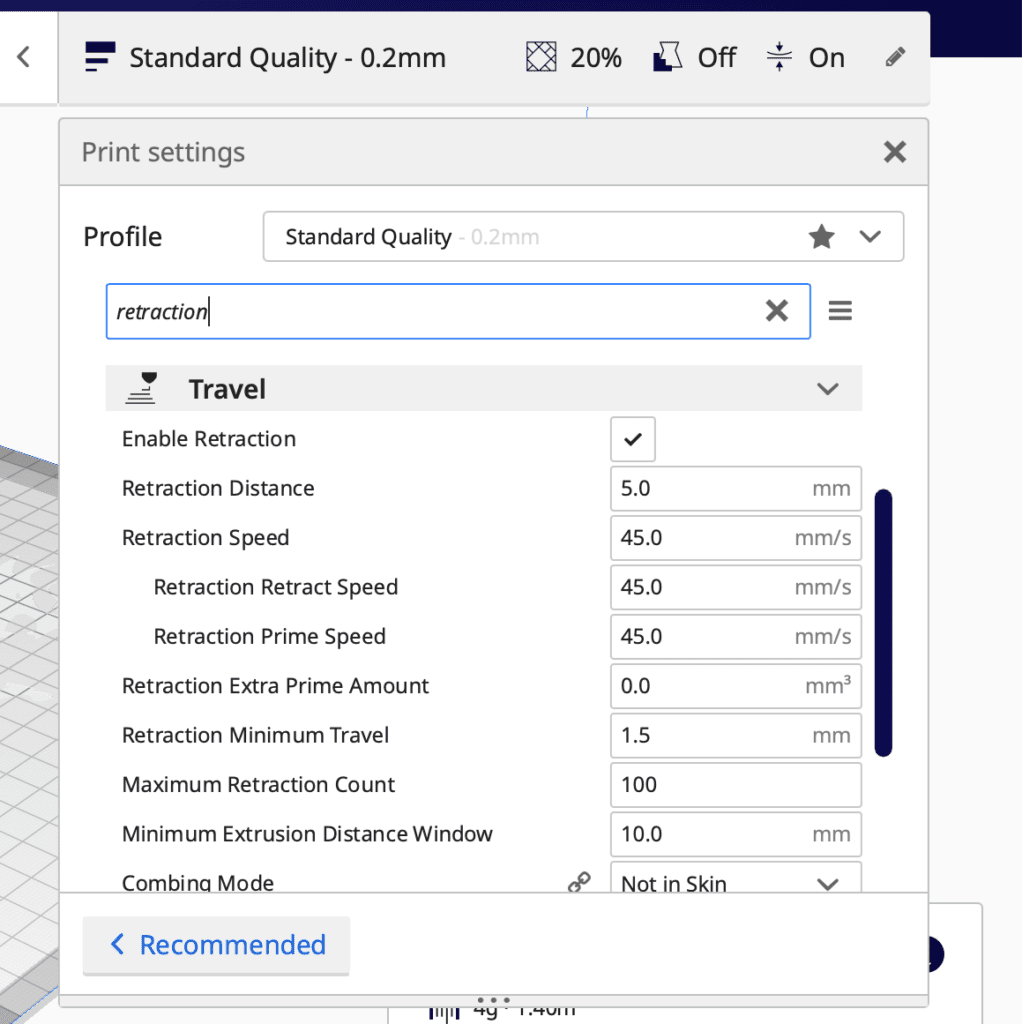
Retraction is when the extruder retracts the filament which in turn prevents the nozzle from pushing out filament as extrusion. With retraction settings you can reduce the stringing caused on your print. There is the retraction distance which we recommend setting at 6 mm for your ender 3 3d printer, with retraction speed set at 45 mm. Dialing in the retraction setting is helpful for when you print stringier filaments such as PETG.
If your print turns out having a lot of stringing coming from it, it might be worth while to try to dial in your retraction settings to see if it will improve the quality of your machines prints. Down below in the models to try we have linked a great model to use to test your retraction settings!
Fan Speed
Fan speed is an important but sometimes forgotten ender 3 cura setting. Enabling a fan to cool your print can help with your prints resolution and cooling of the filament that comes from the nozzle and hot end.
Cooling the plastic is important for small features where if the next layer can get distorted if not cooled fast enough. The first layer the fan should be off giving the first layer enough time to cool down by itself, this could reduce the the amount of warping that could happen.
Trying out different cooling speeds could also be beneficial, especially if you find yourself printing overhangs a lot. Cooling the plastic on overhangs is essential because you do not want the plastic to fully cool before the next layer goes on.
This can easily create a lot of drupe or sag in your model. Dialing in a fan speed that works for you can fix some of these problems.
Models to test your 3D printer
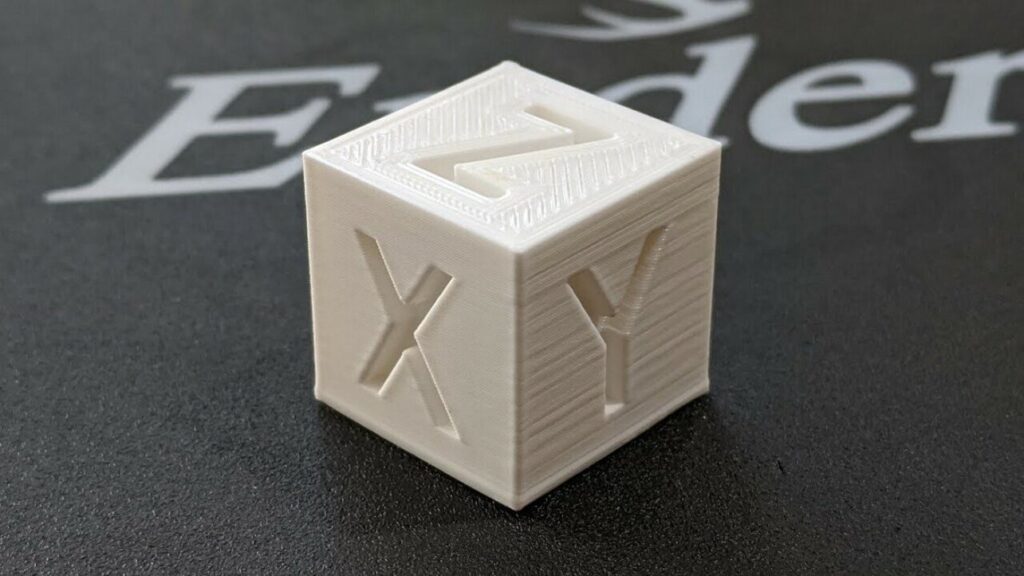
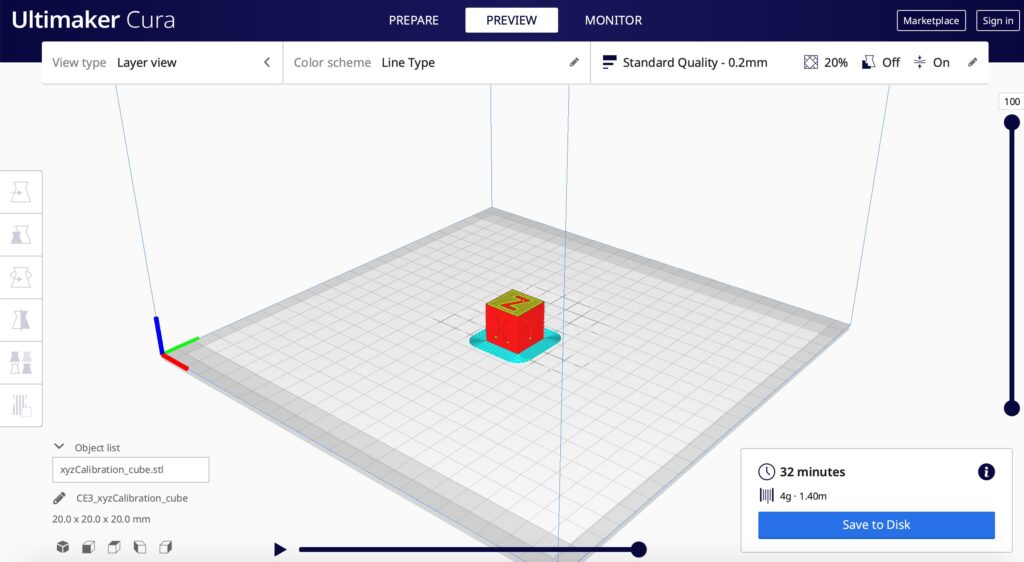
A model we recommend to test your Creality ender is the 20 mm x 20 mm test cube. This can be used to check the progress of tuning your machine. By adjusting your 3D printers settings in Cura you are able to dial in your machine to eventually getting flawless prints. Be sure to save your cura profiles to reuse them every time you 3d print.
You can download the file here on thingiverse's website.
Using a small 3D printable model like the calibration cube can help diagnose problems with your 3d printer sooner than something large, a model like this will only take 30 minutes.
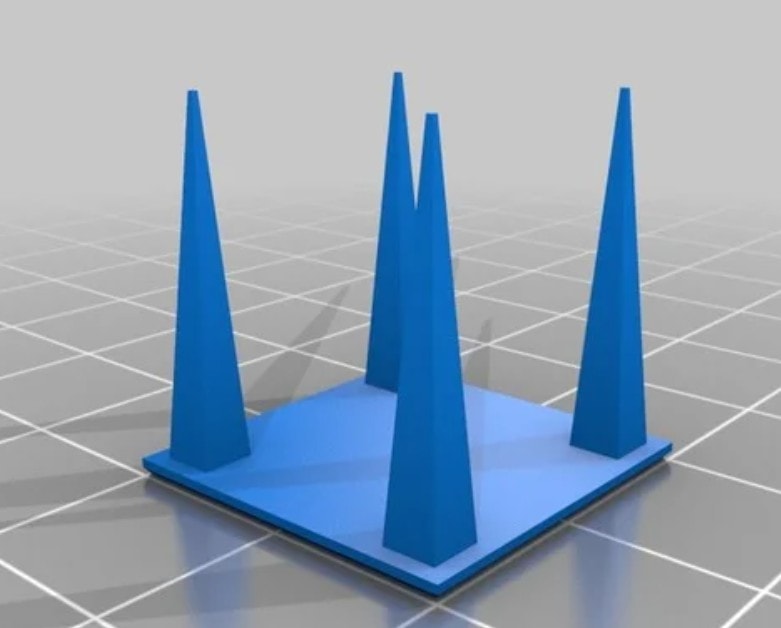
The retraction test is a great test if your ender 3’s prints come out with a lot of stringing going on. I have attached the model’s files here: https://www.thingiverse.com/thing:909901 This is a good print to use to test out different cura settings with your printer to check and dial in your retraction speeds and distances.
Something like this would be a great resource especially if you find yourself printing in PETG a lot.
A model like this should only take about 20 minutes, making it easily repeatable to find the values that work best for you.
Diagnosing problems with your Ender 3 3D printer
The first step to diagnosing problems is identifying the problem. In this article I will go over common problems and how to solve them for your ender 3. Many of these common problems are easy to diagnose and easily fixable with either cura setting adjustment or slight modification to hardware settings.
A great way to start out figuring if there are problems with your printer is to print a test cube like the one linked above in this article.
If there are any defects in your print be sure to compare them with our common problems list to diagnose what might be the cause and the fix to your problem!
Bed Adhesion
Firstly is bed adhesion. Is your 3D printed model warping from the build plate? This is a common indicator that you need to re level your 3d printers bed. This can be done through the menu on the ender 3s display.
First, select auto home. Now your printer should have homed itself in the x axis, the y axis, and the z axis. The next step is to find a business card or 0.1 mm thick fueler gauge and go from each corner and either tighten or loosen the bed springs using the adjustment knobs on the bottom of the bed.
The business card or gauge should semi loosely slide between the bed and extruder. Keep making adjustments and make sure to turn the motors off in the settings before moving the extruder. After you have done that move the extruder and bed with your hands and adjust in each corner and in the middle of the bed.
Extrusion
Another common problem you might encounter is that your layers don’t look complete and are spotty. This could be a number of problems but the easiest to trouble shoot is try using the included tool that looks like a thin metal needle. Use this to stick in the nozzle of the extruder assembly. What you might be experiencing is a nozzle clog. If this does not fix your Ender 3’s printing problem try replacing the nozzle with a new one.
Another Common failure: Plastic Parts
There are some common plastic parts on your ender 3 that may cause printing errors or failures. Firstly, I am talking about the plastic filament guide that is on the extruder motor. It is recommended you upgrade it to an aluminum part to fix any tension problems. What can happen is the plastic breaks and the motor no longer has tension on the filament.
This can also cause miss extrusion from the nozzle. Another part that is recommended is replacing the white filament tube that takes the filament from the motor to nozzle. Replacing it with a upgraded part that reduces the friction and has a tighter diameter to avoid clogs.
3D printing on your own

A great place to download models for your ender 3 3D printer is on thingiverse, which has millions of different models you can download, create and comment on others models with your own account. There are thousands of different projects you can find on thingiverse.
3D modeling for your 3d printer
If you are wanting a learning experience you can design your very own models to 3d print with your machine using a computer aided drafting (CAD) software. One software we can recommend that is a great free resource.